
Slate's Woodshop
This plan builds a finished, insulated "building within the barn." A 12-ft-wide strip runs the full 50-ft length of one sidewall and holds the woodshop, a central stairwell, and a climate-controlled storage room, with a storage loft over all three. The woodshop sits in the front corner with its own man door on the gable end, left of the centered 15-ft garage door, plus a 6-ft double door into the bay beside the stairs. The remaining floor stays as an open, full-height drive-in bay. Both rooms are conditioned.
Floor plan
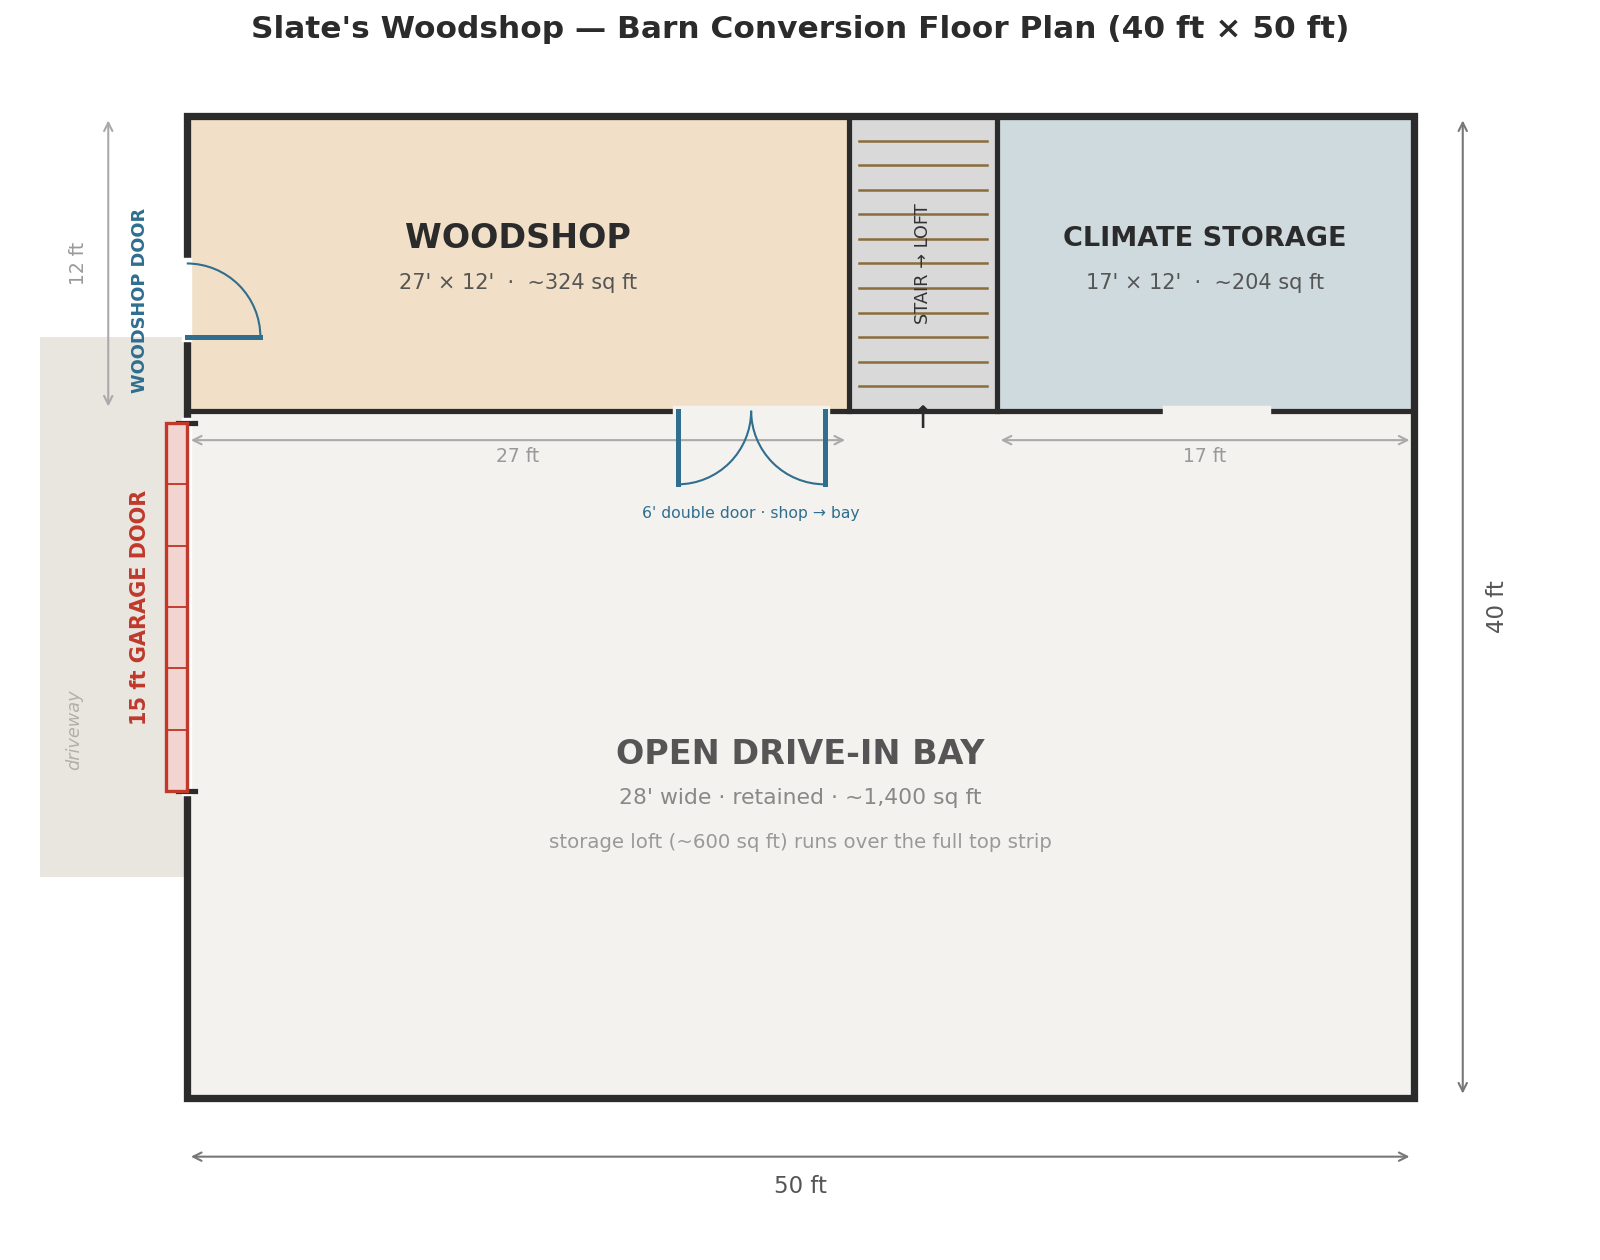
Exterior concept
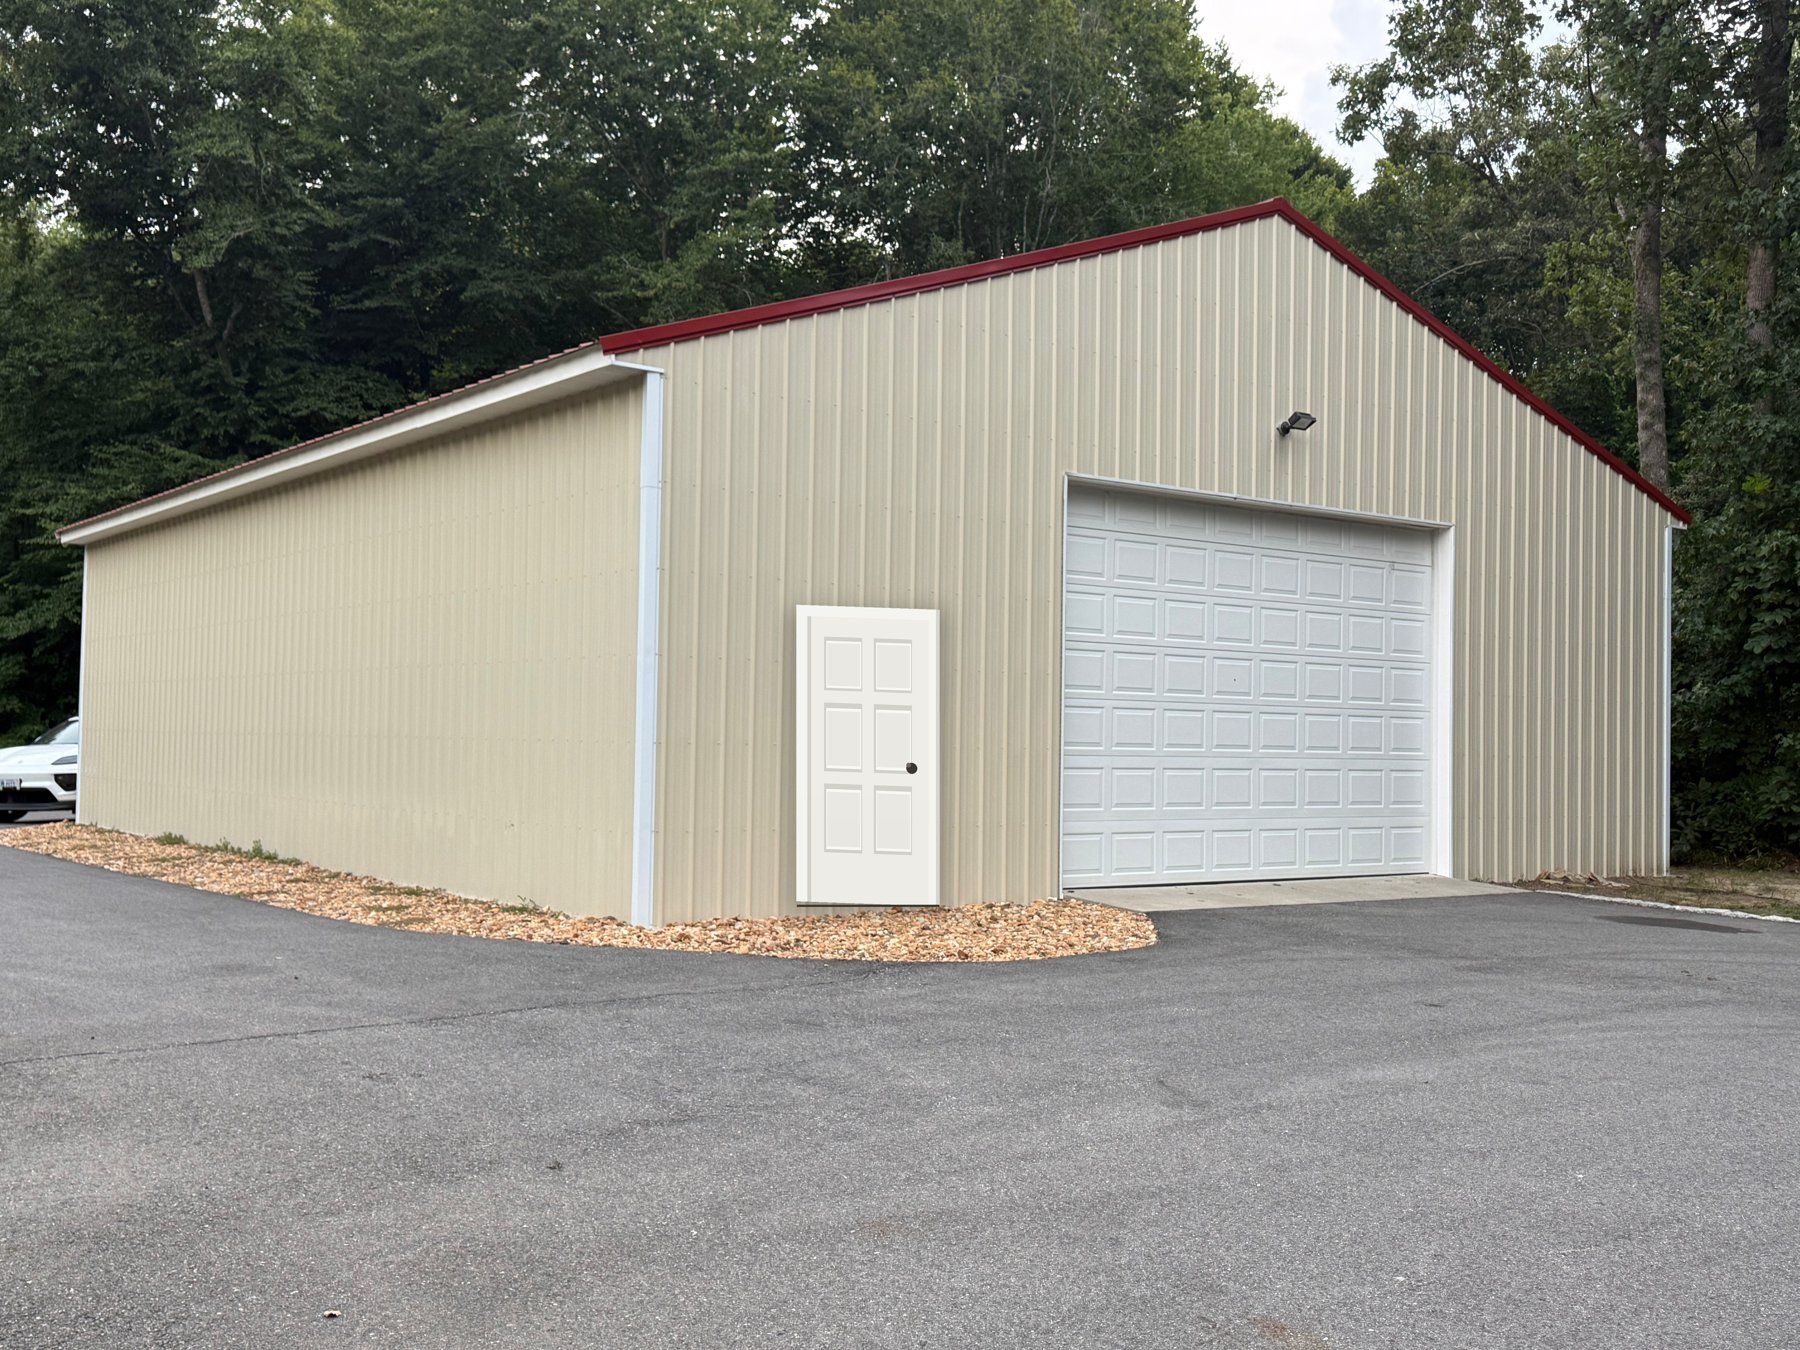
Layout & dimensions
| Zone | Footprint | Area | Notes |
|---|---|---|---|
| Woodshop | 27 ft × 12 ft | ~324 sq ft | Front of strip; gable man door + 6-ft double door to bay by the stairs |
| Central stairwell | ~6 ft × 12 ft | ~72 sq ft | Straight-run stair to the loft; splits the two rooms |
| Climate storage | 17 ft × 12 ft | ~204 sq ft | Sealed, insulated, conditioned room at the back of the strip |
| Storage loft | 12 ft × 50 ft | ~600 sq ft | Over the entire strip; reached by the central stair |
| Open drive-in bay | 28 ft × 50 ft | ~1,400 sq ft | Retained as-is; centered 15-ft garage door on the gable end |
Total barn footprint 2,000 sq ft. The buildout consumes ~600 sq ft of floor and adds ~600 sq ft of loft.
Structural plan
Walls
- 2×4 stud walls (16″ O.C.), 8 ft tall: one 50-ft long wall facing the bay, a furring/stud wall against the steel skin, two 12-ft end returns, and two 12-ft partitions.
- Pressure-treated bottom plate on a sill gasket, anchored to the slab. Double top plate to carry loft framing.
Loft — support it independently of the trusses
- Center beam (built-up LVL or doubled 2×12) down the length, carried by posts on footings/slab; joists span the 12-ft width.
- Loft joists 2×10 at 16″ O.C. (confirm span/spacing with a local engineer for ~40 psf storage load).
- Deck with 3/4″ T&G plywood/OSB — ~600 sq ft.
Stairwell
- Straight run to the ~9-ft loft floor: ~14–15 risers, ~11–12 ft of run — fits the 6 ft × 12 ft center bay with landing room. Prefab stringer kit; 36″ guard at the loft, 34–38″ handrail.
Headroom — working numbers
From interior photos, the eave is estimated at ~12–13 ft with truss bottom chords at the top of the wall and roughly a 4/12 pitch. Confirm with a tape measure before framing.
- Recommended 8-ft room walls put the loft floor at ~9 ft: roughly 3–4 ft of clearance at the eave wall rising to ~7 ft at the loft's inner rail.
- 8-ft ceilings mean standard sheet goods with no ripping, and less wall to frame and insulate.
- If the tape shows 14 ft+, walls can go back to 9 ft with the same loft usability.
Climate & insulation — both rooms conditioned
- Insulate the full envelope of both rooms — walls and the loft floor above. Closed-cell spray foam (R≈5.6–8/inch) against the steel skin insulates and stops condensation; batt over furring is the lower-cost alternative with a good vapor strategy.
- HVAC: two independent single-zone mini-splits. Storage room 9,000–12,000 BTU (17 × 12 room); woodshop 15–18,000 BTU if big machines run in summer, otherwise 12k. Independence means the shop can run hard on sawdust days, one failure doesn't take out both, and storage holds a 24/7 setpoint.
- Mount both condensers outside the strip wall, short line-sets through the wall; keep the storage condenser clear of shop dust.
- Woodshop head needs a washable filter and regular cleaning; keep it away from the sanding station.
- Weatherstrip all three doors — especially the 6-ft double door to the unconditioned bay.
- Any conditioned space in a steel building needs air-sealing and a vapor plan or condensation will drip off the metal.
Electrical
- Subpanel fed from the barn service.
- Woodshop: multiple 20A 120V circuits plus 240V circuits for stationary machines; outlets every few feet; ceiling drop or wall whip for the main machine.
- Dedicated circuits for both mini-splits; LED lighting in all three spaces and the loft; switched lighting at the stair.
- Rough in dust-collection circuits now.
Materials — rough take-off
| Item | Rough quantity | Purpose |
|---|---|---|
| 2×4 studs (precut 92-5/8″) | ~150 | 8-ft wall framing, 16″ O.C. |
| 2×4 plates (16 ft) | ~28 | Bottom (PT) + double top plates, ~148 lf of wall |
| 2×10 joists (12 ft) | ~40 | Loft floor, 16″ O.C. over 50 ft |
| LVL / built-up beam + posts | 1 run | Center loft beam carried to the slab |
| 3/4″ T&G plywood (4×8) | ~19 | Loft decking, ~600 sq ft |
| Prefab stair stringer kit | 1 | Straight run to the loft + handrail/guard |
| Insulation | ~1,000–1,400 sq ft | Closed-cell foam (both rooms) + batt options |
| Drywall or 3/4″ ply (4×8) | ~68 | Wall/ceiling finish (ply is durable for the shop) |
| Mini-splits (single-zone) | 2 units | 12k BTU storage + 12–18k BTU woodshop, independent condensers |
| Doors + hardware | 3 openings | Gable entry, 6-ft double door shop→bay by the stairs, storage door |
| Subpanel, wire, boxes, LED fixtures | 1 lot | Electrical rough-in & finish |
| Anchors, sill gasket, fasteners, vapor barrier | 1 lot | Misc consumables |
Build sequence
- Tape-measure the eave/truss height and check slab condition; confirm permit needs for loft + electrical.
- Snap layout lines; anchor PT bottom plates to the slab.
- Frame perimeter and partition walls.
- Set the loft beam and posts, frame joists, lay the deck.
- Build and set the staircase; add loft guard and handrail.
- Rough-in electrical and both mini-split line sets.
- Insulate — closed-cell in both room envelopes, batt where chosen.
- Hang drywall or plywood; finish walls and ceilings.
- Install both mini-splits, doors, LED lighting, and outlets.
- Move in: set machines, run dust collection, energize 240V circuits.
Open items
- Tape-measure confirmation of eave height and truss bottom-chord height (photo estimate: ~12–13 ft).
- Engineer check on the loft beam/joist sizing for real storage loads.
- Existing electrical service size at the barn; whether water is nearby.